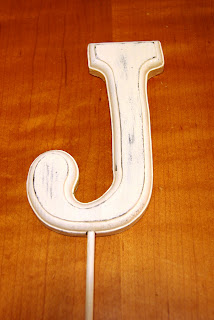
I don't know why I had not thought of that before, but it was worth a shot. I started my Google search on "how to paint shabby chic." Many different tutorials came up, but they all seemed a little too technical and confusing. A few seemed a little weird, such as applying Vaseline on the project before painting. I'm sure it works great, but I wasn't up for trying that. I needed something easy.
I decided to just go with it and figure out my own way of doing things. These were a few supplies I bought to start the project.
A
basic 5" high wooden letter, creamy white acrylic paint and black
acrylic paint, very fine sand paper, and a wooden dowel. Not pictured is
a spray can of clear gloss sealant.
I
got to work sanding the edges of the letter to give it some rounded
edges. Then I got started and painted the entire letter black.
Since
I am impatient I sped up the drying time by using my hair dryer. Once
the black paint was dry I covered it with the creamy white paint. It
looked super beautiful.
Just
kidding, with only one coat of creamy white it looked like crap. I had
to cover it with two more coats after that. It had to completely cover the
black coat of paint.
Again
I used my hair dryer to speed up the drying time. Once it was
completely dry, I took the very fine sand paper and started sanding
here, there and everywhere. This allowed some of the black to peek
through.Word
of warning: don't use rough sand paper. If you do, it will take off all
the coats of paint and wood will show through. That's not the idea
here, you only want to take off the first few layers of paint.
Then
I gave it one coat of clear gloss sealant. I didn't want to give it
more than one coat because I didn't want it too shiny. This sealed the
paint and gave it a slight sheen.
Mr. Buck helped me drill a hole on the bottom of the letter, just slightly bigger than the dowel.
We then
added super glue in the hole and placed the painted dowel in. Luckily we
were careful, and no layers of skin were harmed during this process of
super gluing. (Which is shocking.)
Voila! My shabby chic cake topper, all for under $10.
What do you plan to use for your cake topper? Have you thought about making one?


No comments:
Post a Comment