Wrong. I deliberately put that question mark there because I never intended on there being a part three. I am actually quite surprised I am writing a part three for these wish tags, but I am so glad I am. Remember how I ended my last post with wanting to tweak the color palette of the wish tags? I ran out to Michaels, again, last night to find some new supplies that would add some color to this project. By the way, I asked Mr. Buck what his guess is as to how many times I will go to Michaels before the wedding. His guess? Seventy seven times. That seems somewhat high and dramatic, but I guess we will see when it is all said and done.
Well I kind of did more than just tweak the color palette. More like completely change the entire thing. I thought that I should use my colors for the wedding. If I use sage colored tags with light pink embossing, then maybe the wish tags would look like little leaves on the tree. I ended up buying large squares of card stock and then cutting them down into 4 x 6 squares. This was much cheaper than using the pre-cut tags, and I was able to make them bigger to give my guests more room for writing.
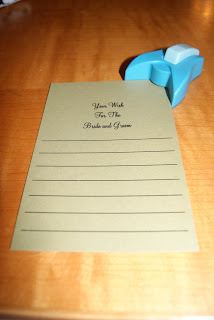
After I cut all the squares I ran them through the printer like I showed you how to do in part one. Only this time I made the font larger and added more lines for writing. I also invested a whole $3 in a corner rounder. Best thing ever, it made these tags look so much nicer. I also bought a heart shaped hole punch for the top to be able to string the ribbon through. Although this is the must frustrating hole punch EVER. It punches upside down, ridiculous right? And no I am not doing it wrong. I am not sure what to do about that yet, I think I will just have to either have upside down hearts or just use a regular hole punch.
I also bought pale pink embossing powder. Completely glitter free. Remember when I mentioned here how I should be restrained from glitter? Yeah, in part two of Best Wishes I used glitter. I now have glitter sprinkled throughout my house, on my dogs, and embedded on my couch. I should have just said no to the glitter. So this time around I used no glitter, only solid pink. I embossed the exact same way as how I showed you in part two.I now present to you the tweaked (ahem, completely redone) wish tag project.
Now I get to tackle building the actual tree where these cute wish tags will hang.
How many times did it take you to perfect a project?
Also, does anyone know where I can find a heart shaped
hole punch that punches RIGHT SIDE UP?
{All photos are personal}
Also, does anyone know where I can find a heart shaped
hole punch that punches RIGHT SIDE UP?
{All photos are personal}


No comments:
Post a Comment